You watched a Hyrox video and said to yourself: "That's for me"? But between registrations, travel, and cost, the idea sometimes seems out of reach. What if the key to getting started and making lasting progress was... in your own home? Frankly, preparing for a Hyrox in your home gym isn't just possible, it's often the smartest strategy for balancing an active life with an ambitious goal.
Key Points to Remember
- Your home gym is a strategic asset for mastering the Hyrox format and optimizing your transitions in complete privacy.
- A limited space can be structured effectively into flow zones and with alternative equipment (rower, sandbag, heavy weight).
- The key to successful preparation is a balanced training cycle alternating strength, mixed sessions, and endurance.
- A structured monthly test is sufficient to measure your progress without harming recovery and work on weak points.
- Logistical organization and simulating race conditions are as crucial as physical development.
Hyrox Decoded: A Format, A Challenge, A Preparation
Before you push your couch aside to make space, you really need to understand what you're going to have to replicate. Hyrox isn't just "a bit of cardio and a bit of strength training." It's a precise protocol, a standardized format that mixes running and functional exercises in an unchanging order. You will link 8 work stations, interspersed with 8 runs of 1km each. The beauty of it? You can time yourself at home and compare your time with that of an athlete in competition. That's the magic of the format.
The Two Sides of the Same Coin: Running and Stations
Don't be mistaken. If you are a pure runner, the strength stations will stop you in your tracks. Conversely, if you are strong but your cardio falters, you will lose all your advantage on the runs. The key is in the balance.
- The Run (8 x 1km): This isn't a long-distance run, it's an active recovery run between intense efforts. The goal? Maintain a sustainable pace that allows you to start the next station without being completely wiped out. In your living room or garage, this translates to work on a treadmill, or, failing that, indoor cardio sessions (rower, bike, jump rope) calibrated to simulate this energy expenditure.
- The Stations (8 exercises): Here is the list, in order. This is your roadmap for setting up your home gym:
- SkiErg (1000m)
- Sled Push (push a loaded sled for 50m)
- Sled Pull (pull a loaded sled for 50m)
- Burpee Broad Jumps (80m in burpee jumps)
- Rowing (1000m)
- Farmer’s Carry (200m with heavy loads)
- Sandbag Lunges (100m of lunges with a sandbag)
- Wall Balls (medicine ball throws at a target)
Why Your Home Gym is a Major Asset
Frankly, preparing specifically for this format in a classic gym is a headache. You'd have to monopolize several machines in a row, carry kettlebells from one end of the gym to the other... It's unmanageable. Your home gym, however, becomes your personal laboratory. You organize the space exactly as you wish. You can repeat the specific sequences, get familiar with the transitions (this is where dozens of seconds are gained or lost), and work on your weaknesses in complete privacy, without the gaze of others. It's a huge psychological advantage. You build your confidence repetition after repetition, in your own environment.
Designing Your Training Space for the Hyrox Format

The core problem is simple: a Hyrox circuit chains together 8 stations of cardio and strength work, in a fixed order. Your space must accommodate this, sometimes brutal, alternation between very different efforts. We are not talking about having a professional gym here, but about intelligently organizing your zone to avoid losing 30 precious seconds rearranging dumbbells between each exercise.
Flow Logic: Your Best Ally
Think of your circuit as a production line. You chain together ski-erg, sled push, burpees, ramping... The idea is to minimize transitions. To do this, adopt flow logic.
Here is a concrete example based on a 4m x 4m space:
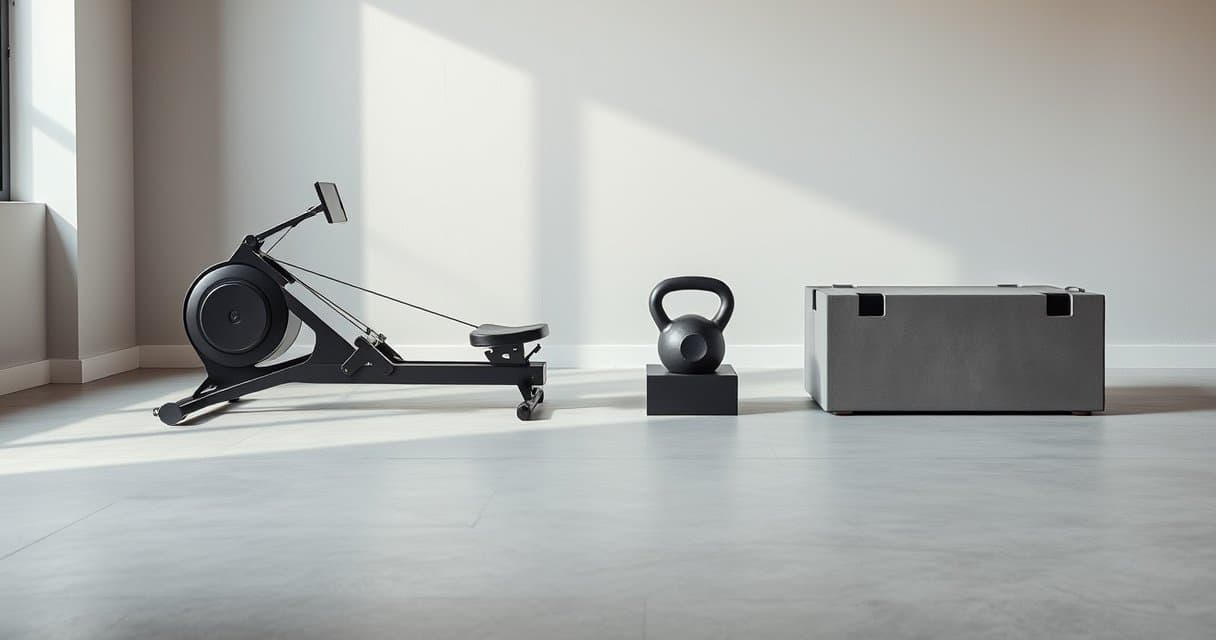
- Zone A (Heavy Cardio): Place your rower or ski-erg against a wall. Right next to it, prepare the space for your sled (or its substitute). After a rowing station, you are already in place to push or pull.
- Zone B (Ground Strength): Clear a corridor 3 to 4 meters long for your weighted walking lunges. This space will also serve for burpees and "ramping" (plank pull-throughs).
- Zone C (Vertical Work): A clear wall area for your wall balls. This is also where you could hang a pull-up bar if you have one.
The goal is not to create three separate rooms, but three distinct hubs within the same room. You move from one hub to another, like in a real competition. That's the spirit.
Smart Compromises for Small Spaces
No room for a 50 kg sled? No problem. The beauty of a home gym is ingenuity. Here are some swaps that save the day:
| Hyrox Event | Ideal Equipment | "Limited Space" Alternative | Key Considerations |
|---|---|---|---|
| Sled Push | Loaded sled | Heavy sandbag on a smooth floor or grass mat | Ensure constant resistance. Push for at least 10m. |
| Walking Lunges | Hyrox weighted vest | Sports bag filled with books/sandbags, or a dumbbell held in "goblet" position | Keep torso upright. The weight must be stable. |
| Rower/Ski-Erg | Dedicated machine | Jump rope for pure cardio, or burpees + mountain climbers in a circuit | Cardio intensity must be equivalent. Be ruthless with the pace. |
Frankly, for the price of a single high-end cardio machine, you can equip an entire garage with these alternatives. The key is to replicate the type of effort: pushing, pulling, carrying, jumping.
The Floor: Your Most Critical Piece of Equipment
We rarely think about it, but it's crucial. You will jump, throw a medball, set down weights heavily. A bare concrete floor will destroy your joints and your equipment. A living room carpet will get torn up.
The do-it-all solution? A 15mm thick rubber gym mat, in a roll or interlocking tiles. It cushions impacts, stabilizes your feet for lunges, and protects your floor from shocks. For the wall ball area, even consider a plywood wall panel (painted black, it looks clean) to protect the plaster. These details make the difference between a space that motivates you and a cluttered mess you're ashamed of.
Our Selection
Hey folks! We tested three products for you that could really revolutionize your home fitness routine. Whether you're looking to add weight to your pull-ups, equip a small space with a complete station, or simply protect your floor from impact and noise, we've found some gems with strengths and, let's be honest, a few limitations. Here's our unfiltered experience.
| Product | Max Load / Coverage | Main Material | Strengths | Points to Consider |
|---|---|---|---|---|
| Fitgriff Dip Belt | 100 kg | Neoprene & Polyester | Comfort, sturdiness, universal fit | Requires a break-in period |
| Marcy Eclipse HG3000 | 68 kg (column) / 90 kg (resistance) | Steel | Versatility, compact, stable | Long assembly, limited resistance |
| Floor Protection Mat | 1.67 m² (per set) | EVA Foam | Isolation (noise/impact), modular, lightweight | Average grip, marks easily |
Fitgriff Dip Belt

For those who want to progress with weighted pull-ups or dips, this belt is a real game-changer. Honestly, it exceeded our expectations on several points. The double-layer construction is really clever: the neoprene against the skin is comfortable and distributes pressure well, while the reinforced polyester on the outside handles impact without a problem. We tested with loads around 30-40 kg, and it inspires confidence. The D-rings are reinforced and, importantly, positioned so they don't dig into your back, a detail that makes all the difference on a long set.
The system with the steel chain and two carabiners is super practical. You adjust the length in a second and change plates quickly. In terms of sturdiness, no complaints, even after months of intensive use. The "comfort" point deserves nuance: the first few uses can be a bit stiff, as the belt needs time to mold to the shape of your hips. You really need to break it in a bit for it to become perfectly comfortable. Another limitation: if you are very slim or very broad, the adjustment via the chain works, but the neoprene part itself is not stretchy. It's a "one-size-fits-most" model that suits the majority, but not all extremes.
In summary, it's excellent value for a durable accessory. It's far from a gimmick and quickly becomes indispensable if you work with extra weight. Just be patient during the break-in period.
Marcy Eclipse HG3000

If you have a corner of the garage or a dedicated room and want an all-in-one solution without taking up a whole apartment, the Marcy Eclipse is a serious contender. Its greatest strength is its versatility in a compact footprint. Chest press, pec-deck, lat pulldown, bicep curl, leg extension... you have what you need to work your whole body. The assembly, although long (allow 3 to 4 hours for two people), is well thought out with clear instructions. Once assembled, the machine is surprisingly stable thanks to its weight (over 100 kg).
We were pleasantly surprised by the smoothness of the movements. The ball-bearing pulleys and quality cables ensure smooth transitions, close to what you find in a gym. The seat and pads are adequately padded for acceptable comfort. Now, let's talk about the limitations. The maximum resistance, although "multiplied" up to 90 kg on some exercises, remains limited for advanced strength athletes. If you already lift very heavy, you'll quickly hit the limit. Another point: the height under the lat pulldown bar might be tight for people over 1.85m tall. Finally, the weight selection system with the pin is basic, and you sometimes have to contort yourself to see the plate numbers clearly.
So it's an ideal machine for beginners to intermediates, or for those prioritizing hypertrophy and muscle maintenance at home. It's robust, gets the job done for a wide variety of exercises, but won't replace a full gym for an experienced powerlifter.
Floor Protection Mat

These interlocking EVA foam mats are the simple solution for turning a corner of your home into a workout area without breaking everything. Their first advantage is their lightweight and modular nature. You assemble them like building blocks to cover the surface area you need, and you can even cut them to fit shapes. They are waterproof and easy to clean, a real plus.
The isolation is effective: they dampen the noise of dropped items (dumbbells, plates) well and visually protect your floor from scratches. We also appreciate the thermal insulation; your feet are less cold on tile in winter. However, it's important to be clear about what they are not. They are not a professional gym floor covering. The thickness (1 cm) is sufficient for isolation but not for cushioning a heavy drop like a deadlift. The grip on the floor can be average on smooth hardwood; the mats tend to shift a bit if you do dynamic movements on them.
Another observed limitation: under a very concentrated and heavy load (like the feet of a machine or a piece of furniture), the foam can deform permanently, leaving marks. They mostly return to shape, but not perfectly flat. Finally, the total area of one set (1.67 m²) is quite small; you often need to order several for a useful zone.
These are perfect mats for a simple, temporary, or modular setup. They do a great job of basic protection and comfort, as long as you don't ask the impossible of them.
Essential Equipment and Alternatives for Each Movement
Let's break it down. The goal is not to recreate a CrossFit® box in your living room, but to target the essentials to cover the eight functional movements of Hyrox. We're talking about equipment that must fit in a limited space and often serve multiple purposes.
The Non-Negotiable Core
For a home gym dedicated to Hyrox, three pieces are absolutely essential:
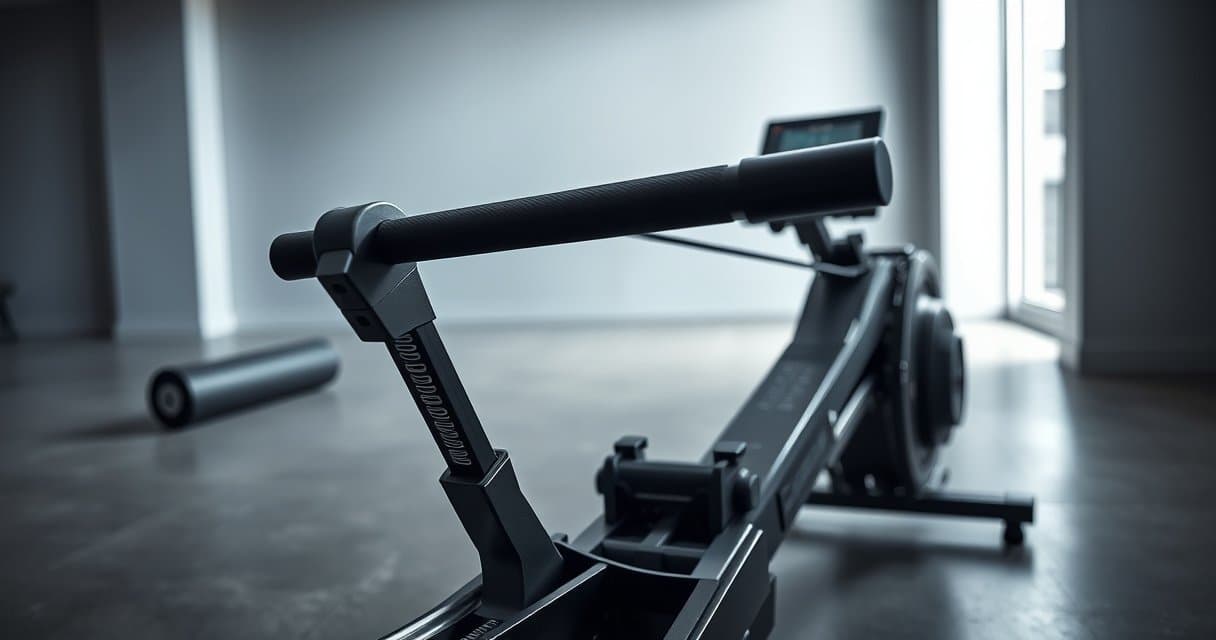
- A rower. This is your number one cardio tool, the one that simulates the first and last event. You don't need the most expensive model, but prioritize a chain or belt system for a pull sensation close to competition machines. 20 minutes, 3 times a week, is a good starting point.
- Heavy dumbbells or a kettlebell. This targets the carry movement. For men, a single weight around 20-24 kg is a good standard; for women, 12-16 kg. One is enough to start, as the format is unilateral. This is the investment that will truly help you progress on simulated farmer's carries and sandbag lunges.
- An adjustable sandbag. Frankly, it's the best investment after the rower. Look for a model where you can vary the weight from 10 to 30 kg. It will advantageously replace a medball for wall throws, and be perfect for lunges and carries. Its instability will force you to brace your core like in competition.
The Art of Clever Substitution
No ski-erg or sled at home? No problem. The trick is to replicate the intensity and type of effort, not the exact movement.
| Hyrox Movement | Home Gym Alternative | Key Point |
|---|---|---|
| Ski-erg (push pull) | Rower + resistance setting. Crank the resistance to max and do short intervals (30 sec) focusing on pushing with your arms. The goal is to burn the shoulders and triceps. | It's the intention that counts. |
| Sled Push/Pull (pushing/pulling heavy) | DIY sled. Place a heavy plate on a towel on hardwood or a yoga mat. Attach a sturdy strap to it and pull it for 10-15m. To push, simply use a heavy box against a wall. | The goal is the load on the legs and cardio, not perfect sliding. |
| Wall Balls | Sandbag at the shoulders. Perform a thruster (squat + lifting the bag overhead) aiming for a high mark on your wall. The movement is more complete and just as grueling. |
The Little Extras That Make a Big Difference
With the core equipment, you can already do everything. But if you have a bit more budget and space, two elements make a notable difference:
- A pull-up bar or gymnastics rings. Burpee pull-ups are an event in themselves. Even if you do jumping burpees in the meantime, nothing replaces specific vertical pulling training. Rings can be hung anywhere and are versatile.
- A simple, loud timer. The mental aspect is crucial. Training with a timer that beeps for work and rest intervals is putting yourself in race conditions. Your phone works, but a dedicated timer avoids distractions.
My opinion? Don't fall into the "I need this gadget" trap. Start with the rower, a heavy weight, and a sandbag. Train like that for a month. You will then identify, through real frustration, the only piece of equipment you are truly missing. That's much more effective.
Building a Progressive and Effective Training Cycle

Preparing for Hyrox at home isn't just about randomly stringing together burpees and pull-ups. Without the structure of a club or a coach, you absolutely must create your own. Otherwise, you'll go in circles – and probably get injured. The key? Intelligently alternating workout types to develop both raw endurance, specific strength, and that crucial mental resilience for race day.
The Typical Week: Balance and Specificity
Here is a model you can adapt. It rests on three pillars: an endurance session, a specific strength session, and a mixed training session.
- Tuesday: Hyrox Strength Session. This is the day to work on the heavy movements of the format. For example:
- Weighted pull-ups (or band-assisted if you're a beginner): 4 sets of 5-8 reps.
- Sled push (or a heavy wheelbarrow, or even safely pushing your car): 5 round trips over 20 meters.
- Deadlift or heavy kettlebell swing: 5 sets of 8 reps.
- The goal here is not exhaustion, but movement quality under load.
- Thursday: "Mixed" or "Skill" Session. The most important for your progress. You will link two Hyrox elements in a short, repeated circuit. Try this:
- Circuit: 500m on the rower (or ski erg) + 10 burpees over the box (or a sturdy bench).
- Repeat this circuit 4 to 6 times, with a strict 90-second rest between each.
- The idea is to get used to moving between stations under fatigue, without completely emptying your tank. This is where you learn to manage your transitions.
- Saturday: Endurance or Simulation Session. The longest day. You can either do a 45-60 minute conversational-paced run to build your engine, or, every other week, attempt a partial simulation. For example: 1km run (treadmill or outside) / 30 wall balls / 200m rower / 20 kettlebell swings. Repeat this block 3 times. Time yourself. This is your benchmark for progress.
Progression: The Art of Dosing Difficulty
Don't do the same thing every week. Add weight, reduce rest time, slightly increase volume. A simple method: choose one variable per session and change it every 2-3 weeks. For Thursday's "mixed" session, go from 4 to 5 rounds. For strength, add 2.5kg to your weighted pull-ups. For the simulation, reduce your total time by 30 seconds. These small victories add up.
See priceThe Crucial Importance of Active Recovery and Mobility
This is home gym trap number one: you're always near your equipment, and the temptation to "do just a little bit more" is huge. Resist. Your "off" days are as important as your training days. An active recovery day is 20-30 minutes of targeted mobility: opening the hips for wall balls, working on thoracic mobility for pull-ups and the rower, stretching the hamstrings for running. Frankly, neglecting this is signing a ticket for tendonitis. Get a foam roller, put on a YouTube video, and do it seriously. Your body will thank you, and your performance will take off.
Adapting the Logistics of Circuits to Your Environment
Where many get stuck is in imagining the flow of a Hyrox circuit in a limited space. Yet, with a bit of cleverness, you can perfectly recreate the logistics and intensity. The goal is not to slavishly copy a gym box, but to make the format your own.
The Big Challenge: Managing Transitions
In a competition, you move from station to station. At home, you manage the clock AND the equipment change. The key? Organize your space like a workshop.
- Place your rower and your ski erg side by side if possible. The ideal is to be able to slide from one machine to the other without losing a second.
- Create a dedicated "loading zone." A sandbag, your kettlebells, and your dumbbells should be placed in the same spot, ready to be grabbed. Absolutely avoid having to search for them under furniture or behind a bike.
- For sleds, the classic problem is the surface and push length. If you have an 8-10m hallway, it's perfect. If not, get creative: a shorter push but with a heavier load (add 25-30% weight) and more repetitions (e.g., 4 round trips instead of 2) can generate similar fatigue. The goal is oxygen debt, not the exact distance.
Simulating the Run: The Trap to Avoid
You don't have a treadmill? Excellent news. Running in place is one of the worst ways to train for the "run" part of Hyrox. Here are your concrete alternatives, in order of preference:
- The real outdoors. This is the best option. Structure your circuit in a "hybrid" way: do your strength work in your home gym, then go outside for your 1km run. It's uncomfortable? Yes. But so is Hyrox.
- Jump rope. One minute of double-unders (or fast single jumps if you're a beginner) roughly equates to 200-250m of running in terms of cardiac impact. Alternate 3-4 minutes of jump rope with your other stations. It's brutal and very effective.
- High knees in place or ali shuffles at maximum intensity, in 30-second intervals.
Managing Noise and Impact (Without Angering Your Neighbors)
The sandbag dropping, the jumps in place… diplomacy is part of your preparation.
- Invest in a thick gym mat (at least 2cm) to absorb impact. This is non-negotiable.
- For box jumps or medball throws, favor "soft" hours. And use a rubber medball that doesn't bounce (and won't damage your wall).
- A little-known tip: for pulling movements like the ski erg, wedging the machine's feet against a wall significantly reduces rocking noise and vibrations.
Your "Garage Hyrox" Sample Session
Here's what a home circuit could look like, without needing 50m²:
- Run: 3 minutes of high-intensity jump rope.
- Station 1: 500m on the rower.
- Transition: 10 burpees (to simulate fatigue and change of position).
- Station 2: 50m sled push (round trip in your hallway with a heavy load).
- Transition: 15 air squats.
- Station 3: 100m on the ski erg.
- Station 4: 20 walking lunges with a sandbag.
- Go back to the "run" (jump rope) and start a new round.
The secret is in the flow and active minimalism: no pause, no hesitation about equipment. You learn to manage chaos in the (relative!) comfort of your home gym. That's a huge advantage on race day.
Testing Yourself and Progressing Without the Pressure of Competition

This is the ultimate advantage of your home gym for Hyrox: you are the sole judge. No official clock flashing, no eyes of others on you. This is liberating, but it also demands a different kind of discipline to truly make progress.
Set Your Own Performance Benchmarks
Forget the final time of an official Hyrox to start. It's too distant and too intimidating. Break it down into concrete micro-goals you can achieve in your space.
For example, first aim for a reduced circuit. Do 3 stations instead of 8, with the same work/cardio sequences. Time yourself. Once comfortable, add a station. It's progressive and mentally manageable. Your goal is not "do a Hyrox in 1h15", but "hold on for 45 seconds more on the sleds today" or "chain 5 burpees over box without catching my breath". These small victories are the fuel for your long-term progression.
Create Your Monthly "Test Day"
Once a month, simulate a real evaluation session. Prepare as for a race: nutrition, serious warm-up, equipment in place. Choose a fixed format that you will repeat. For example:
- 1/2 Format: 4 stations (e.g., ski erg, sled, burpees over box, rowing), 1km of running (on treadmill or outside) between each.
- Full Format: All 8 movements, but with reduced loads or distances adapted to your space.
Record everything: your total time, your time per station, your average heart rate, and above all, how you felt. Completely exhausted by station 5? That's a sign your strength endurance needs work. It's this analysis, more than the raw time, that will guide your training for the following month.
The Logistics of "Race Day" at Home
Frankly, this is the biggest technical challenge. In a competition, everything is set up. At home, you have to manage transitions. Here's how not to lose 30 precious seconds looking for your dumbbells:
- Script your space. The day before your test, lay out ALL the equipment in the exact order of the stations. If your circuit is: SkiErg -> Kettlebell -> Sled, place these three pieces of equipment in that sequence, with just enough space to move between them.
- Prepare your loads. Adjust your sandbags, load your sled, check your kettlebell weight. Everything must be ready to use, no last-minute adjustments.
- Simulate the run. If you have a treadmill, set it to a realistic speed (say 12 km/h) and know how to start/stop it quickly. If you run outside, define a simple, measured route (a 250m loop that you do 4 times for 1km). The trap? Losing time opening a door or negotiating a tight turn.
This logistical rigor is not anecdotal. It teaches you to manage stress and mental fatigue, skills as crucial as physical strength on the day of the real competition.
The Unpopular Opinion: The Mistake to Avoid
Many fall into the trap of the too frequent "full test". Exhausting yourself by reproducing the hell of the full Hyrox every two weeks is the recipe for stagnation, injury, and burnout. Your body doesn't recover, and you don't have time to work on your weaknesses between sessions.
My advice? A maximum of one full test per month, and truly go all out. The rest of the time, you are not a competitor, you are an athlete under construction. Work on the identified weaknesses, improve your technique on a movement, boost your base cardio. On test day, you will reap the fruits of this silent work. Progress comes from intelligent training, not from compulsive repetition of the format.
Conclusion
Preparing for a Hyrox in your home gym is about much more than just equipment. It's a personal adventure. You learn about yourself, how to tinker with your workouts, and how to push your limits within your own space.
On race day, you will be ready. Because every training session will have been a concrete step toward that goal. So, go for it. Your garage, your living room, your basement... your first starting line is already there.
Frequently Asked Questions
How to prepare for Hyrox at home without full equipment?
It is possible to prepare with smart alternatives: replace the sled by pushing a heavy sandbag on a smooth surface, simulate the SkiErg with high-resistance rowing intervals, and use an adjustable sandbag for lunges and wall balls.
What is the best at-home workout for Hyrox?
An effective weekly cycle alternates a specific strength session (pull-ups, heavy pushing), a "mixed" session linking two exercises from the format (e.g., rower + burpees), and an endurance running session or a partial simulation of the circuit.
What basic equipment is needed to train for Hyrox at home?
The essential core includes a rower for cardio, dumbbells or a heavy kettlebell (20-24kg for men, 12-16kg for women) for carries, and an adjustable sandbag to replace several stations like lunges and wall balls.
How to simulate the Hyrox run in a small indoor space?
Avoid running in place and favor jump rope, where 3-4 minutes of effort equals the cardiac impact of a 1km run, or structure your training in a hybrid way by going outside to run between your indoor strength stations.
How to organize a home gym for a Hyrox circuit?
Organize your space into three distinct flow zones: a cardio zone (rower/ski-erg), a floor strength zone for lunges and burpees, and a wall zone for wall balls, to minimize transition time between stations.
How often should a full Hyrox test be done at home?
Perform a full test or a partial simulation at most once a month to assess your progress, as doing it too often prevents recovery and specific work on your weaknesses.
100% free and independent — All our articles are written independently, without any sponsorship. We may receive a commission if you make a purchase through our links, at no extra cost to you.
Guides you might like

Choosing Your HYROX Jump Rope
Choose the right HYROX jump rope to save time and energy. Avoid mistakes with our guide on finding the perfect rope for your event.

Hyrox Dumbbell Buying Guide
Hyrox demands the right gear. Discover the key features for choosing competition-ready dumbbells to maximize performance and safety.
HYROX Rower Buying Guide
Choose a rower built for HYROX: prioritize raw air resistance or high-end magnetic models with watt display for brutal, repeatable performance.
You might also like

HAISSKY Sports Armband Review with Earphone Pocket
HAISSKY Sports Armband review for HYROX: durable, secure phone holder for intense workouts of running, rowing, carries, and burpees.

Funyord Kids' Swim Headband with Ear Plugs Review
Explore why the Funyord Children's Swimming Headband is a surprisingly perfect piece of gear for adult HYROX athletes. Redefine performance essentials.

Kricely Men's Trail Running Shoes Review
Kricely Men's Trail Running Shoes reviewed: Can they withstand the brutal demands of a HYROX competition? Our verdict on their performance and value.